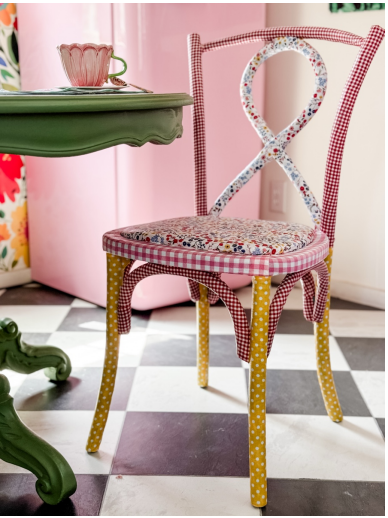
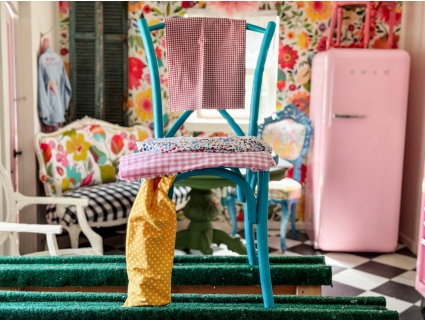
Transform an old chair into a charming cottage statement piece with fabric and decoupage.
Who doesn’t have an old wooden chair tucked in the garage, collecting dust on the porch, or headed for bulk trash day? Before you haul it away, why not transform it into a cottage-chic statement piece? With a little fabric, glue, and imagination, you can decoupage a chair that adds instant charm to any space.
Decoupage isn’t just a groovy 1970s craft—it actually began in 17th-century Venice as a budgetfriendly way to mimic Chinese lacquerware. Even Marie Antoinette decorated with it!
I’ve worked with paper decoupage in the past, but switching to fabric is a total game-changer—
it’s easier to work with, less fussy, and creates the sweetest cottage-style finish. Here is how to
get started on your decoupage chair makeover.
Supplies You’ll Need
- Wooden chair
- Paintbrush
- Mod Podge (or DIY glue mix: 2 parts white glue + 1 part water)
- Thin cotton fabrics (quilter’s cottons work best)
- Scissors
- 400-grit sandpaper
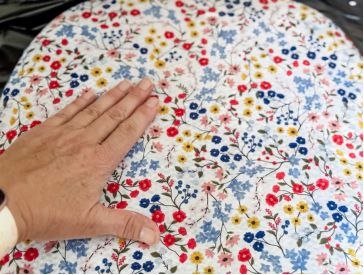
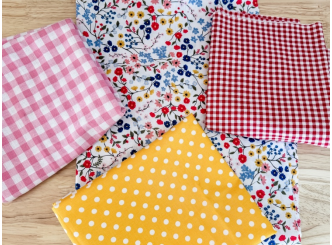
For this chair makeover, I chose a mix of cheerful fabrics: gingham, polka dots, a ditsy floral, and a bold check. Mixing patterns keeps things playful and gives the piece that “collected over time” look that’s perfect for a cozy cottage.
Stick with small-scale, busy patterns like gingham and ditsy florals, as they blend easily and hide seams beautifully. Beware of stripes, which can be difficult to keep straight.
Step-by-Step Instructions
Step 1: Clean & Prep
Give your chair a thorough wipe-down to remove dust and grime. A clean surface helps the glue stick.
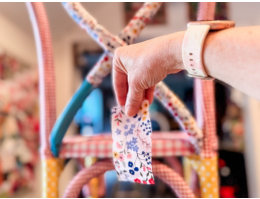
Step 2: Snip & Style
Cut your fabrics into strips or small sections. Smaller pieces are easier to maneuver around curves and details, and you can overlap them to fill in gaps.
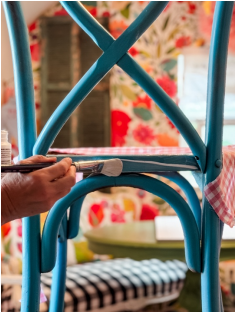
Step 3: Brush It On
Using a paintbrush, coat a small section of the chair with glue. Then brush a thin coat onto the back of your fabric strip.
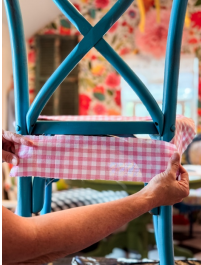
Step 4: Smooth & Press
Lay the fabric onto the chair, pressing it down and smoothing out wrinkles with your fingers. (Yes, you’ll get glue on your hands—it washes right off!)
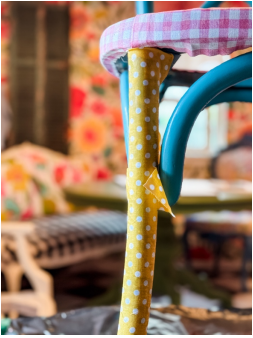
Step 5: Trim as You Go
Don’t worry if the fabric overlaps or hangs over edges. Snip with scissors as you work, even while the glue is wet.
Step 6: Piece by Piece
Move around the chair one section at a time. Patience here makes for a polished finish.
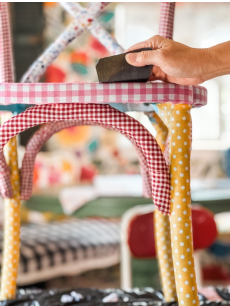
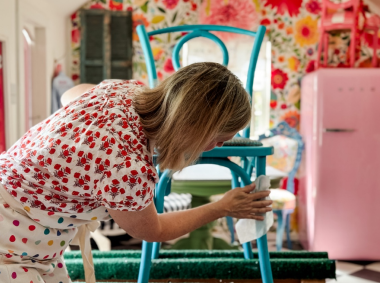
Step 7: Seal the Deal
Once the chair is fully covered, brush 3–5 coats of Mod Podge over the top, letting each coat dry before applying the next. This creates a protective, wipeable surface.
Step 8: Smooth Finish
After the topcoat dries completely, lightly buff the surface with 400-grit sandpaper. This removes tackiness and leaves a smoother finish.
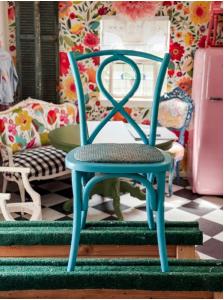
The Big Reveal
And just like that, your once-forgotten chair is now a colorful cottage statement piece! Imagine it tucked into a breakfast nook, sitting pretty at a writing desk, or even welcoming guests in your entryway.
This is one of those projects where imperfections only add to the charm, so have fun mixing fabrics and don’t be afraid to play.